
Making bread at home is an immensely rewarding hobby. Like most types of cooking, bread baking is relaxing, and the fermenting/baking/cooling bread makes your home smell wonderful. Moreover, fresh bread tastes much better than bread you can buy in the store.
I, unfortunately, suffer from a love of whole wheat. Whole wheat is much more difficult to mold into a loaf, because it has a much lower proportion of gluten than white flour. Gluten is what allows a ball of wheat dough to hold its form and trap the air and alcohol that give bread its fluffiness and flavor, respectively, during the fermentation process. So, to make good whole wheat bread, you have to get creative.
Making sandwich bread, with its thin crust and relatively dense interior, is another matter in addition. So, where's a home baker who wants to eat his peanut butter on home made bread to turn? I'll tell you...
Now, dear reader, behold! The making of whole wheat sandwich bread.
Nutritional Information (from www.myfitnesspal.com/recipe/calculator)
Creates two loaves. Gross nutritional information:
Calories: 3,794
Carbs: 674 g
Fat: 88 g
Protein: 111 g
Sodium: 3,416 mg
Sugar: 123 g
Assuming 40 slices total, per slice nutritional information:
Calories: 95
Carbs: 17 g
Fat: 2 g
Protein: 3 g
Sodium: 85 mg
Sugar: 3 mg
Ingredients
-6 cups whole wheat flour (2 cups reserved)
-1.75 cups lukewarm water (1/4 cup reserved)
-1/2 cup whole milk
-1 packet active dry yeast
-1 pinch sugar
- ~1/3 cup olive oil
- ~1/3 cup honey
-1.5 teaspoons sea salt
-4 tablespoons vital wheat gluten
Directions
-Combine ¼ cup lukewarm water, yeast, and pinch of sugar.
Stir until it enters suspension. Let sit until it develops a bubbly appearance, about 5
minutes.
-Combine 2 cups flour, ½ cup milk, 1.5 cups lukewarm water,
and yeast mixture in a mixing bowl until well combined. Let sit for about 20
minutes to form a “sponge”

Image 1: The Sponge (this is after I added the olive oil in the next step)
-Add 1/3 cup oil, then 1/3 cup honey to the sponge and stir
well. Add salt and vital wheat gluten and stir well.
-Begin adding the 4 cups of additional flour, starting 1 cup
at a time. After adding each dose of flour, stir until the new flour is fully
integrated into the forming dough. After adding sufficient flour, stirring will
become impossible, so switch to mixing by hand. You will be able to tell when
you have reached the right balance of flour to liquid when the dough begins
cleaning flour off the sides of the mixing bowl and stops sticking in gobs to
your fingers.

Image 2: Adding flour to the dough

Image 3: This is what your proto-dough will look like when each new cup is fully mixed
-When the dough stops sticking to everything it touches,
dust your counter with flour and turn the dough out on the countertop.

Image 4: A BALL OF DOUGH!
-You will now knead the dough for ten minutes. The purpose
of kneading is to mash the different gluten fibers together so that they will
form a complex lattice that will trap air and alcohol that the yeast produces
during the rise. Kneading should feel like you compressing the dough, never
pulling it apart. Mash the dough down into a flat rectangle, then turn it, fold
it over onto itself, and compress it again. At the end of 10 minutes, it will
be difficult to fully compress it, and this is how you know you have kneaded
enough.

Image 5: I want you to want me (flatten the dough with the heels of your palms)

Image 6: I need you to knead me! (rotate the dough 90 degrees then fold, then flatten again)
-Roll the dough into a ball and place it, smooth side up, in
a lightly oiled bowl. Cover the bowl, and go do what you want for no less than
an hour, and no more than 2 hours, until the dough ball has approximately
doubled in size.

Image 7: Dough Ball

Image 8: It Is Risen
-Take the now much larger ball of dough and turn it out on
your re-floured counter. Gently flatten it, then cut it in half. Roll the dough
up and shape each half into a cylinder about as long as your loaf pans (a loaf
pan is a tall, thin pan that you use specifically for baking loaves of bread).
Do the same with the other half. Make sure the bottom of each dough loaf is
clean by pinching the final seam you create when rolling the dough.

Image 9: Smack that Loaf

Image 10: Loaf Mitosis
-Lightly oil your loaf pans and place a loaf in each. Cover with a towel, and wander off for at least an hour, until the loaves have approximately doubled in size.

Image 11: Form the Loaf, Make It Pretty. Or Not.

Image 12: It Is Risen, Indeed!
-10 to 20 minutes before baking, prepare the oven. Preheat
to 350 degrees farenheit and place an extra pan on the bottom rack.
-When the loaves have risen indeed and the oven reached 350
degrees, throw three ice cubes on the pan in the bottom of the oven, then place
your loaves in the oven. Bake your loaves for 10 minutes, tossing 3 ice cubes
on the bottom rack every 3-4 minutes during the first 10 minutes.
-After the first 10 minutes of baking, turn the loaf pans
around, and tent some aluminum foil above them (no need to make it snug). Stop
throwing ice in the oven and let the bread bake for 30 minutes.
-Take the bread out of the oven and turn out
into a wire rack to cool. Rub a stick of butter all over the crust (this will
make the crust extra wonderful). Once the bread is fully cooled, cut off an end
and enjoy wheaty wonder!
Image 13: Cool, Buttered Loaves
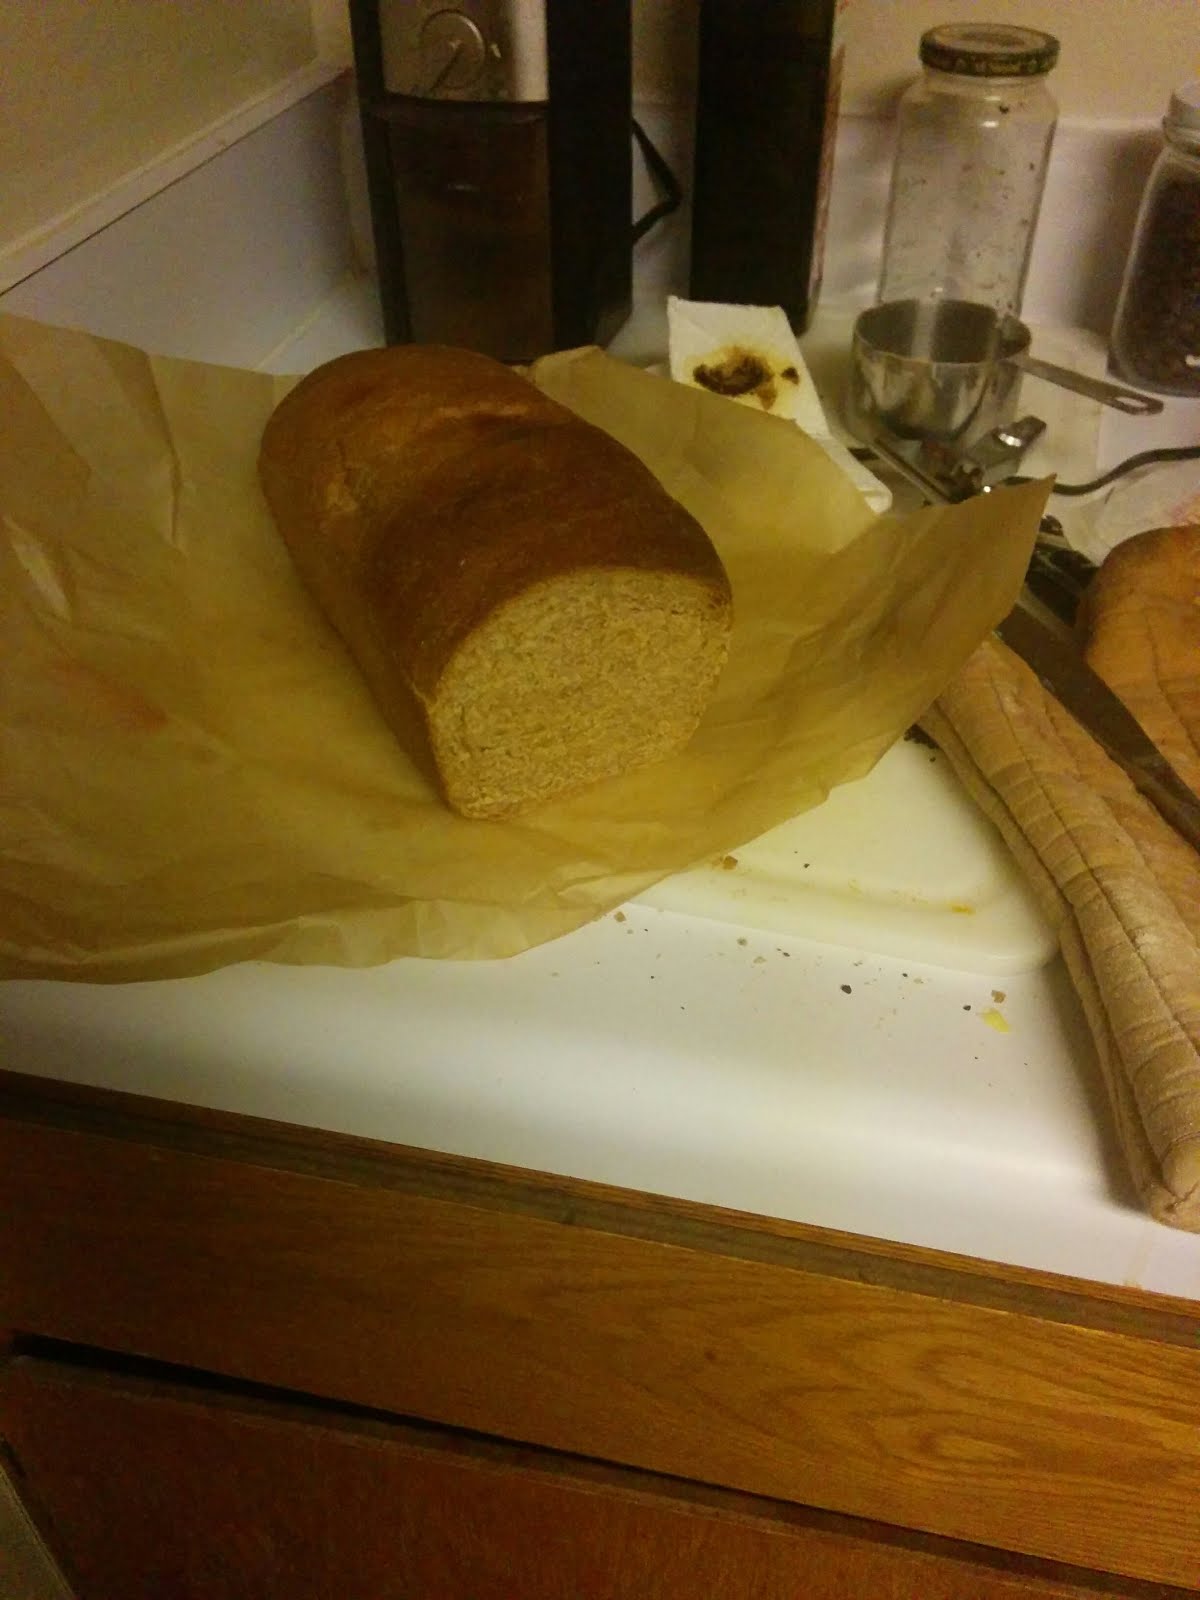
Image 14: The End Is Nigh!
And that, my friends, is how you make a loaf of 100% whole wheat sandwich bread.
Mr. Owings, with as simple as you make this seem, we just might have to try this with the mini-men this weekend! Thanks for sharing!
ReplyDelete